How to customize t-shirts with screen printing?
Screen printing is a fantastic way to create unique, eye-catching designs on t-shirts. Whether you're looking to start a small business, create custom apparel for an event, or simply express your artistic flair, understanding the ins and outs of screen printing can elevate your t-shirt game significantly. So, let’s dive into the world of screen printing and discover how you can customize t-shirts to make your designs come to life!
Understanding Screen Printing
Before you start slapping ink on fabric, it's crucial to grasp what screen printing is all about. Screen printing, also known as serigraphy, is a technique where ink is pushed through a stenciled screen onto a substrate, which in this case is our beloved t-shirt. It’s a versatile method that allows for vibrant colors and intricate designs, making it a go-to choice for custom t-shirt printing.
The Basics of Screen Printing
Examining the basics, we find that screen printing involves several key components: the screen, the ink, and the substrate (the t-shirt). Each of these components plays a vital role in achieving a successful print. The screen is typically made of polyester or nylon, stretched tightly over a frame. It's crucial that your screen is clean and properly prepared to ensure that your designs turn out crisp and clear.
Once the screen is set, ink is applied. In screen printing, there are various types of inks available, each producing a different effect on the fabric. This includes plastisol, water-based, and discharge inks, among others. The choice of ink can greatly influence the feel, look, and durability of your print. For instance, plastisol ink is known for its opacity and vibrant colors, making it ideal for dark fabrics, while water-based inks offer a softer feel and are more environmentally friendly, appealing to eco-conscious consumers.
Importance of Screen Printing in T-shirt Customization
The significance of screen printing in t-shirt customization cannot be overstated. It allows artists and businesses alike to produce high-quality prints in bulk, making it not just cost-effective but also efficient. Whether you're gearing up for a family reunion, a promotional event, or simply want to create something special, screen printing offers that personal touch. Moreover, the process can be tailored to fit various design needs, from simple logos to complex artwork, ensuring that every piece is unique.
Additionally, the longevity of screen-printed designs is impressive. With the right care, they can withstand numerous washes, ensuring that your custom creations last. So, if you’re looking for durability along with style, screen printing is definitely the way to go. Furthermore, the tactile experience of a screen-printed shirt can be quite different from other printing methods; the ink sits on top of the fabric, creating a raised texture that many wearers find appealing. This characteristic not only enhances the visual impact but also adds a layer of depth to the design, making each piece a wearable work of art.
Materials Needed for Screen Printing
Now that we have a grasp of what screen printing is and why it’s important, let's look at the materials you'll need to get started. Preparation is key, so let's ensure that you have everything on hand before you start printing away!
Essential Screen Printing Equipment
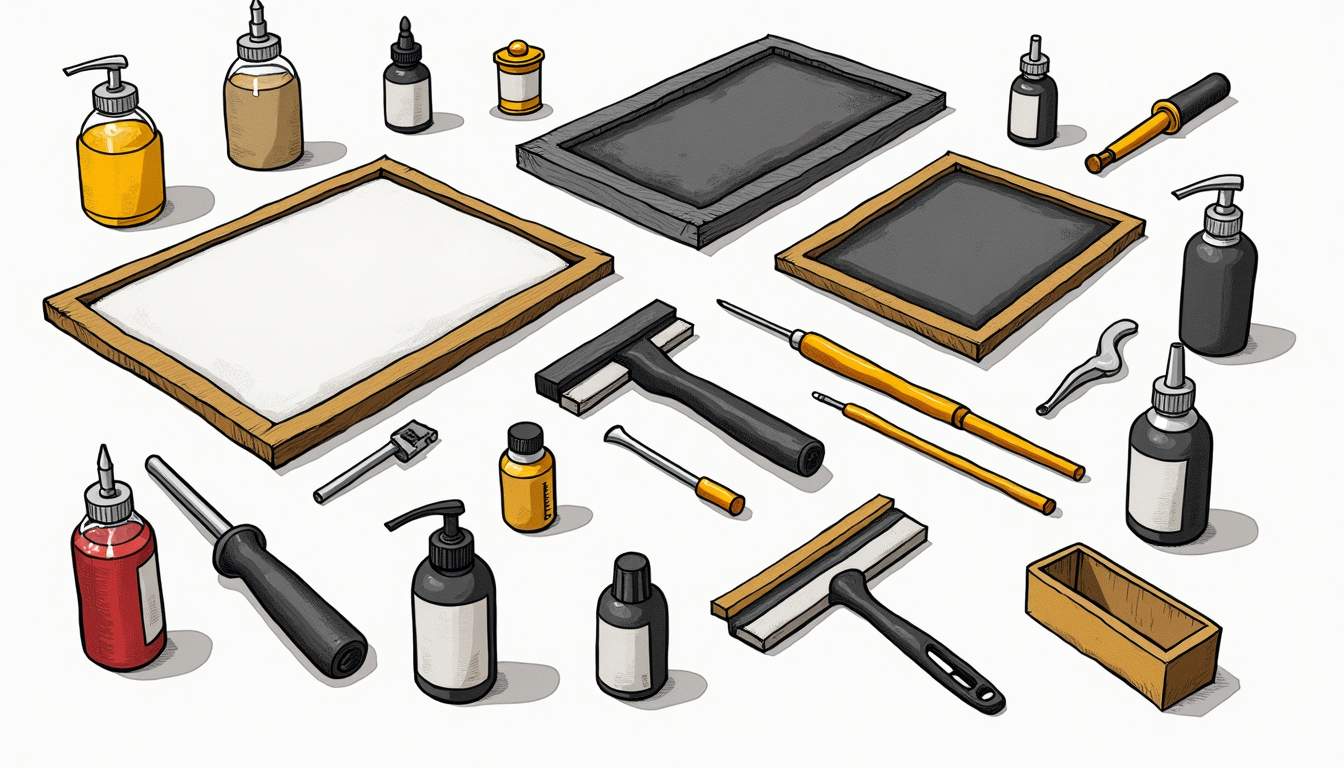
Here's a checklist of essential screen printing equipment you will need:
- Screen frames
- Transparency film for your designs
- Emulsion and sensitizer
- Ink (as discussed previously)
- A squeegee
- Water source for cleaning
- A heat source for curing your prints
Investing in good quality equipment is crucial. For instance, a sturdy squeegee can make a world of difference when you’re pulling ink across the screen. Similarly, a reliable heat source ensures that your prints set properly, preventing any smudges or mishaps later on. Additionally, consider the size and mesh count of your screen frames; a higher mesh count allows for finer details in your designs, while a lower count is better for thicker inks. Having a variety of screen sizes can also help you adapt to different projects, whether you're printing small logos or large graphics.
Choosing the Right Ink for Screen Printing
Choosing the right ink can seem overwhelming with so many options available, but don’t stress! Different inks serve different purposes. If you're printing on dark fabrics, for instance, you might prefer plastisol ink as it offers great opacity. For a more natural feel, water-based inks are ideal since they soak into the fabric. Do a little trial and error to find the best ink that suits your design and fabric type. Moreover, consider the finish you desire; some inks provide a glossy finish, while others offer a matte look. Specialty inks, such as metallic or glow-in-the-dark options, can also add a unique touch to your designs, helping them stand out in a crowded market.
Don’t forget to account for the drying time of different inks as well. Water-based inks typically dry faster than plastisol inks, which may require heat to cure properly. Understanding these nuances will not only streamline your workflow but also enhance the quality of your final product. Experimenting with different combinations of inks and fabrics can lead to exciting results, so keep an open mind and enjoy the creative process!
Preparing Your T-Shirt for Screen Printing
The success of your screen printing endeavor largely relies on the preparation of your t-shirt. A well-prepared canvas means a clean and professional print.
Selecting the Perfect T-Shirt
Your choice of t-shirt can drastically influence the outcome of your design. Consider factors such as fabric type, weight, and color when selecting your t-shirt. Natural fibers like cotton or organic blends tend to hold screen prints better and provide a soft feel against the skin.
Additionally, the fit and style (crew neck, V-neck, fitted, or oversized) will cater to different customers or occasions. Remember, selecting a quality t-shirt not only gives you better print results but also creates a positive experience for anyone wearing it.
Pre-Print Preparations
Prepping your t-shirt for printing involves more than just laying it down on a flat surface. Start by pre-washing the fabric to remove any sizing or chemicals that could interfere with the ink adherence. Press the shirt to smooth out any wrinkles and ensure a flat printing surface.
Lastly, ensure your work area is clean. A cluttered space can lead to accidental ink spills or smudges, which nobody wants! Keeping your workspace organized will help you maintain focus and achieve the best results.
Designing Your Print
Time to get creative! Designing your print is arguably the most enjoyable part of the screen printing process.
Creating a Unique Design
Your design should reflect your personality, brand, or event theme. Use graphic design software like Adobe Illustrator or free options like GIMP to create your visuals. Focus on choosing colors that pop and ensure your design is scalable to fit the dimensions of your screen. Don’t hesitate to sketch it out on paper before heading into software; brainstorming ideas can lead to surprising innovations!
Consider the shirt color when choosing your design colors – contrasting colors tend to stand out, while similar shades may blend in more than you’d like. Remember, the goal is to create something that makes people stop and take notice.
Transferring the Design onto the Screen
Once your design is finalized, it’s time to transfer it onto your screen. This involves coating your screen with emulsion, exposing it using a light source, and then washing it out to reveal your stencil. This process can feel a bit like magic as your design materializes on the screen!
Keep in mind that this stage requires precision and patience. Ensuring your exposure times are accurate will keep your details sharp and clearly defined when inking.
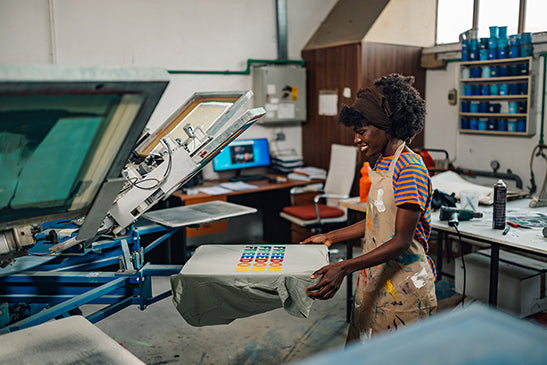
The Screen Printing Process
With all preparations completed, you’re now ready to embark on the screen printing process!
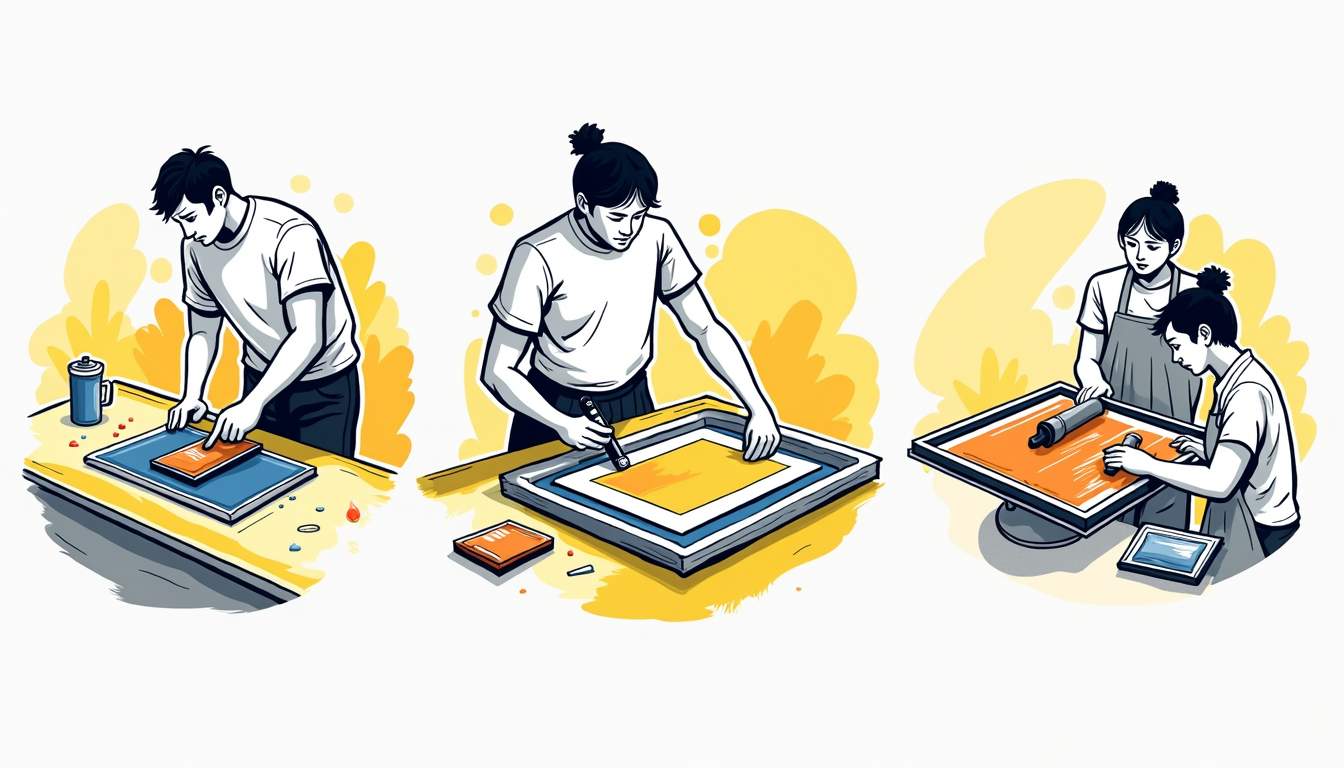
Step-by-Step Guide to Screen Printing
- Set up your screen printing station.
- Place your t-shirt flat on the print bed.
- Position the screen carefully on top of the t-shirt.
- Pour the ink at the top of the screen.
- Use the squeegee to pull the ink across the design.
- Remove the screen and carefully lift the t-shirt.
- Inspect and cure your print using a heat source.
This systematic approach helps ensure that you don’t miss any steps and get the best results possible. The anticipation of lifting the screen and seeing your design printed on the shirt never gets old!
Tips for a Successful Screen Print
As with any craft, practice makes perfect! Here are some tips to help you succeed:
- Test prints: Always do a test run before your final print.
- Cleaning: Keep your screens and tools clean to avoid contamination.
- Patience: Take your time during each step, especially when exposing and curing your prints.
- Consult resources: There are plenty of excellent tutorials and communities online to help troubleshoot any issues.
By adhering to these tips, you’re setting yourself up for screen printing success, ensuring your t-shirts not only look good but also represent your creativity in the best possible light.
In conclusion, customizing t-shirts through screen printing is not just an art; it’s a fun and rewarding process that can lead to spectacular results. So gather your materials, unleash your creativity, and most importantly, enjoy the journey of making something uniquely yours!
Bring Your Custom T-Shirt Designs to Life with Nerds
Ready to transform your screen printing ideas into reality? At Nerds, we're excited to help you showcase your creativity on sustainable, high-quality t-shirts that carry your unique logo. Perfect for enhancing your brand's image or gifting something truly special, our custom merchandise is designed with your vision in mind. Don't wait to make an impression that lasts—Shop Now and let your designs speak volumes.